LSP Client
Welcome to the tenth and final part of this LSP series. After building a comprehensive Language Server Protocol implementation for Smart Data Lake Builder in Scala 3, it’s time to connect it to actual IDEs. In this concluding article, we’ll explore two different approaches to creating LSP clients: a quick integration using LSP4IJ for IntelliJ, and a fully custom VS Code extension that showcases the power of owning your client-side experience.
This final piece completes our journey from understanding LSP fundamentals to building a production-ready language server with AI capabilities, and finally to delivering it to end users through polished IDE integrations.
📦 Code source to be released soon, stay tuned!
Two Paths to LSP Client Integration
We will shortly present how to integrate the server with IntelliJ using LSP4IJ (not to be confused with LSP4J) and then dive deeper into how to really own your client side with the implementation in VSCode.
IntelliJ lets you create your own plugins but recommends doing so using Gradle with either Java or Kotlin. However, the spirit of LSP was that you should focus on building the server side of your own language and IntelliJ should focus on implementing the client side. That’s the theory, but in reality I found some plugins from different code editors to be not mature enough until meeting LSP4IJ, a client plugin of the LSP protocol for IntelliJ maintained by RedHat: LSP4IJ. Their community is highly responsive and friendly and they didn’t hesitate to help us with giving pointers to help integrate our SDLB LSP Server, so big kudos to them!
That said, going that path will therefore reduce the flexibility of your solution by sticking strictly to what the protocol offers, so if you want a more customized solution you may develop your own LSP client anyway. For the sake of the tutorial and out of interest, we decided to do so with the VSCode client part, where we reuse their libraries but build our customization on top of it. So to recap, we will see one quick and easy approach that uses a third-party LSP client with IntelliJ and another approach where we will add customization on top of the solution with VSCode.
Integrate the Server With IntelliJ using LSP4IJ
As you will see, this part is very short because the steps to follow are quite straightforward:
-
Publish your LSP server as a jar or any other executable.
-
Download
HOCONplugin for syntax coloring. -
Download the generic LSP support for IntelliJ using LSP4IJ.
-
Look for the LSP4iJ icon on your IDE and click on the right and select
New Language Server. See screenshot below:
-
Provide the following parameters:
Server > Name→SDLB ServerServer > Command→java -jar $PATH_TO_JARMappings > File name patterns→ click on+and then:File name patterns→*.confLanguage Id→hocon
- Click on
ok. The server should start.

This is the responsibility of the client to start a new process (your LSP server) and start a standard IO communication with it. Then the way they talk is by using json-rpc, which is quite verbose but actually understandable for humans if you need to debug until such a low-level.
Fun fact: I had to do it once because compiling my Scala code in Linux and Windows created a different jar because of the multi-line feature of the language: one used Windows-based newline characters and the other one Linux-based.
That’s it! Our LSP is up and running and the setup was pretty fast. However, there is one part that is slightly not outstanding for user-experience: if you want to use the AI-augmented auto-completion part as seen in part 6, we have to go back into the settings and add the Gemini token as an environment variable. That works but it is not really satisfying as it may not be very natural to do for everyone and it is not stored as a secret: anyone looking at the config will see a leaked token. Usually those tokens may be free-generated tokens so it is not the end of the world but we have to be aware of it.
Also, we can’t have a fine-grained control on other plugins used by the user. For example, GitHub Copilot may not be very great for our custom language as it doesn’t really know about it and may just pollute the suggested completion items.
Lastly, we handle syntax coloring with another third-party plugin, making an extra step for the user. It would be nicer to embed this kind of plugin into our own.
For these three reasons especially, we wanted to create a more customized LSP Client plugin but this time in VSCode.
Building a VSCode Language Server Extension for Smart Data Lake Builder
Creating a Language Server Protocol (LSP) extension for VSCode can seem daunting at first, but with the right approach and Microsoft’s excellent samples, it becomes much more manageable.
Key Features
Our custom VS Code extension provides several enhancements over the generic LSP4IJ approach:
-
HOCON Language Support: Full syntax highlighting and language recognition for
.confand.hoconfiles (credits to hocon-colorizer plugin)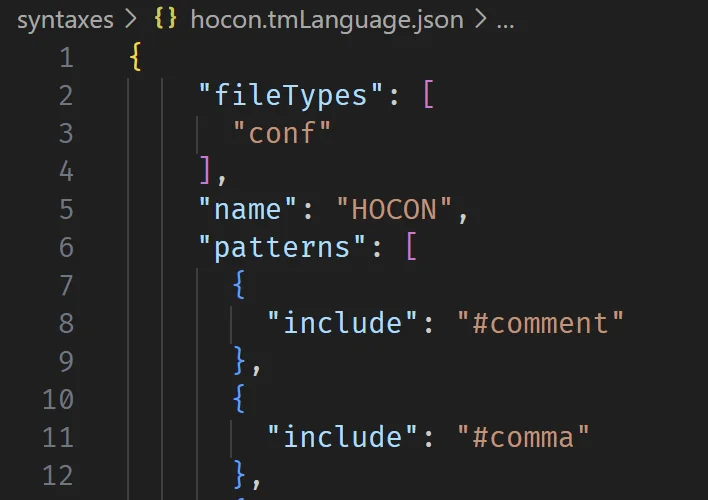
-
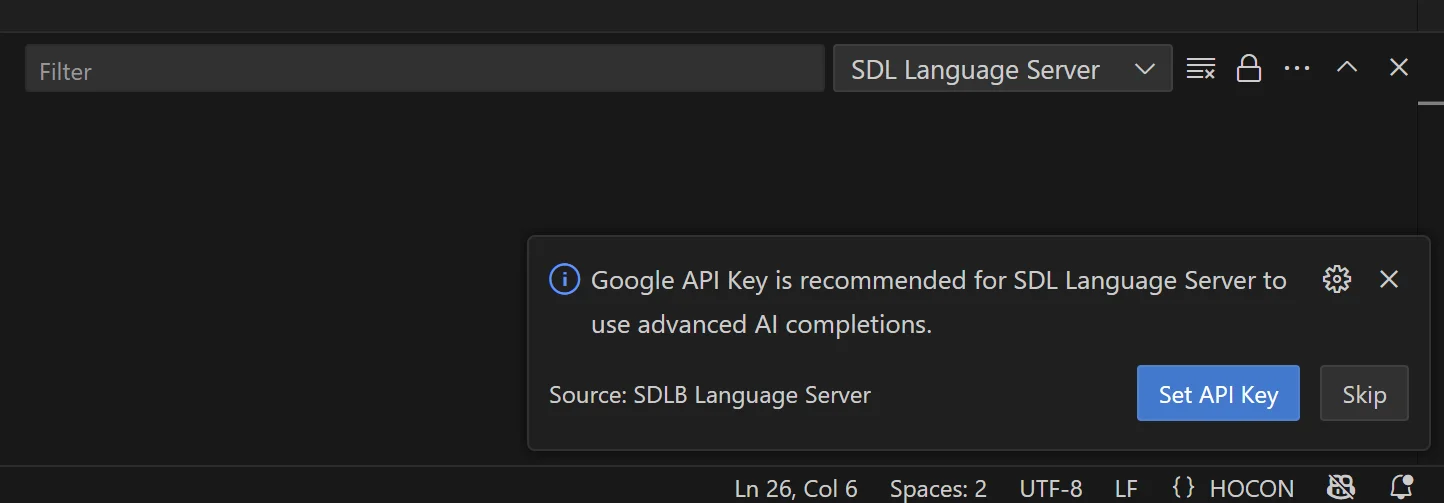
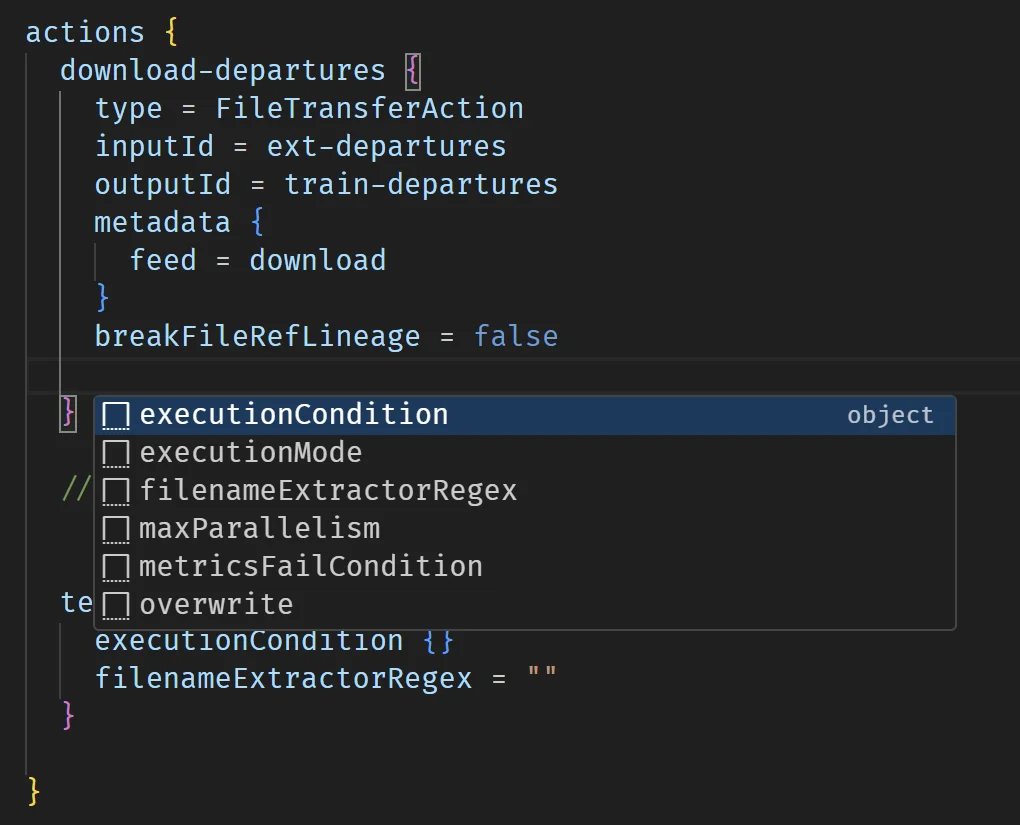
AI-Powered Completions: Optional integration with Google’s Gemini API for enhanced auto-completions
-
GitHub Copilot Integration: Commands to easily enable/disable Copilot for HOCON files
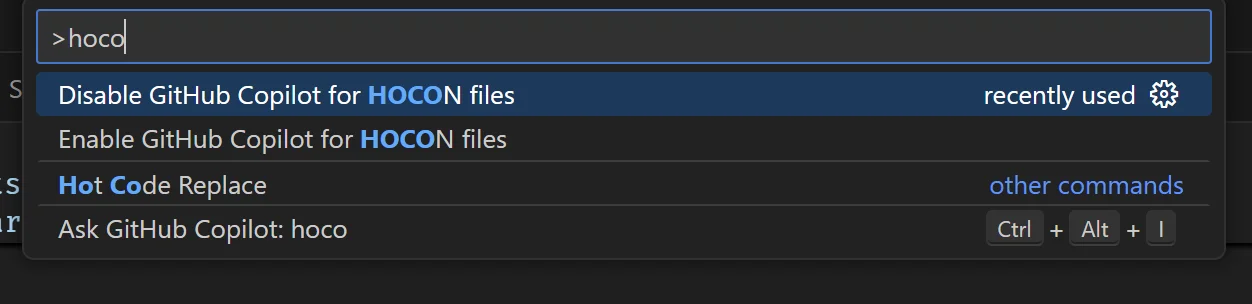
-
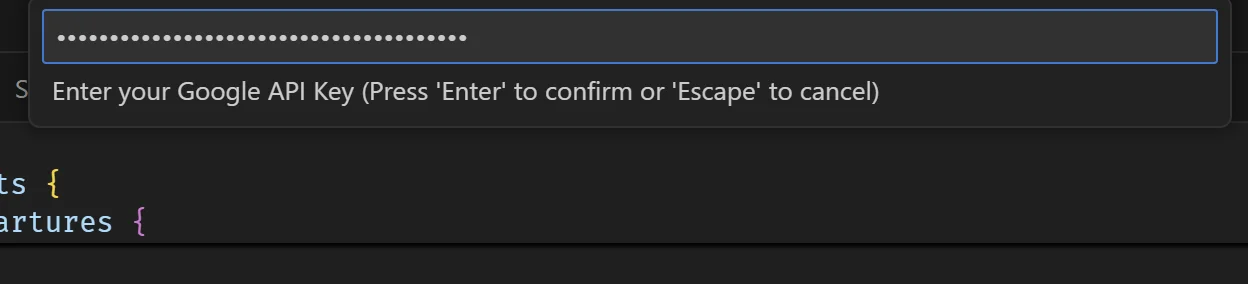
Secure API Key Management: Safe storage and management of Google API keys using VSCode’s secret storage
-
Seamless LSP Communication: Efficient communication with a Scala-based language server
-
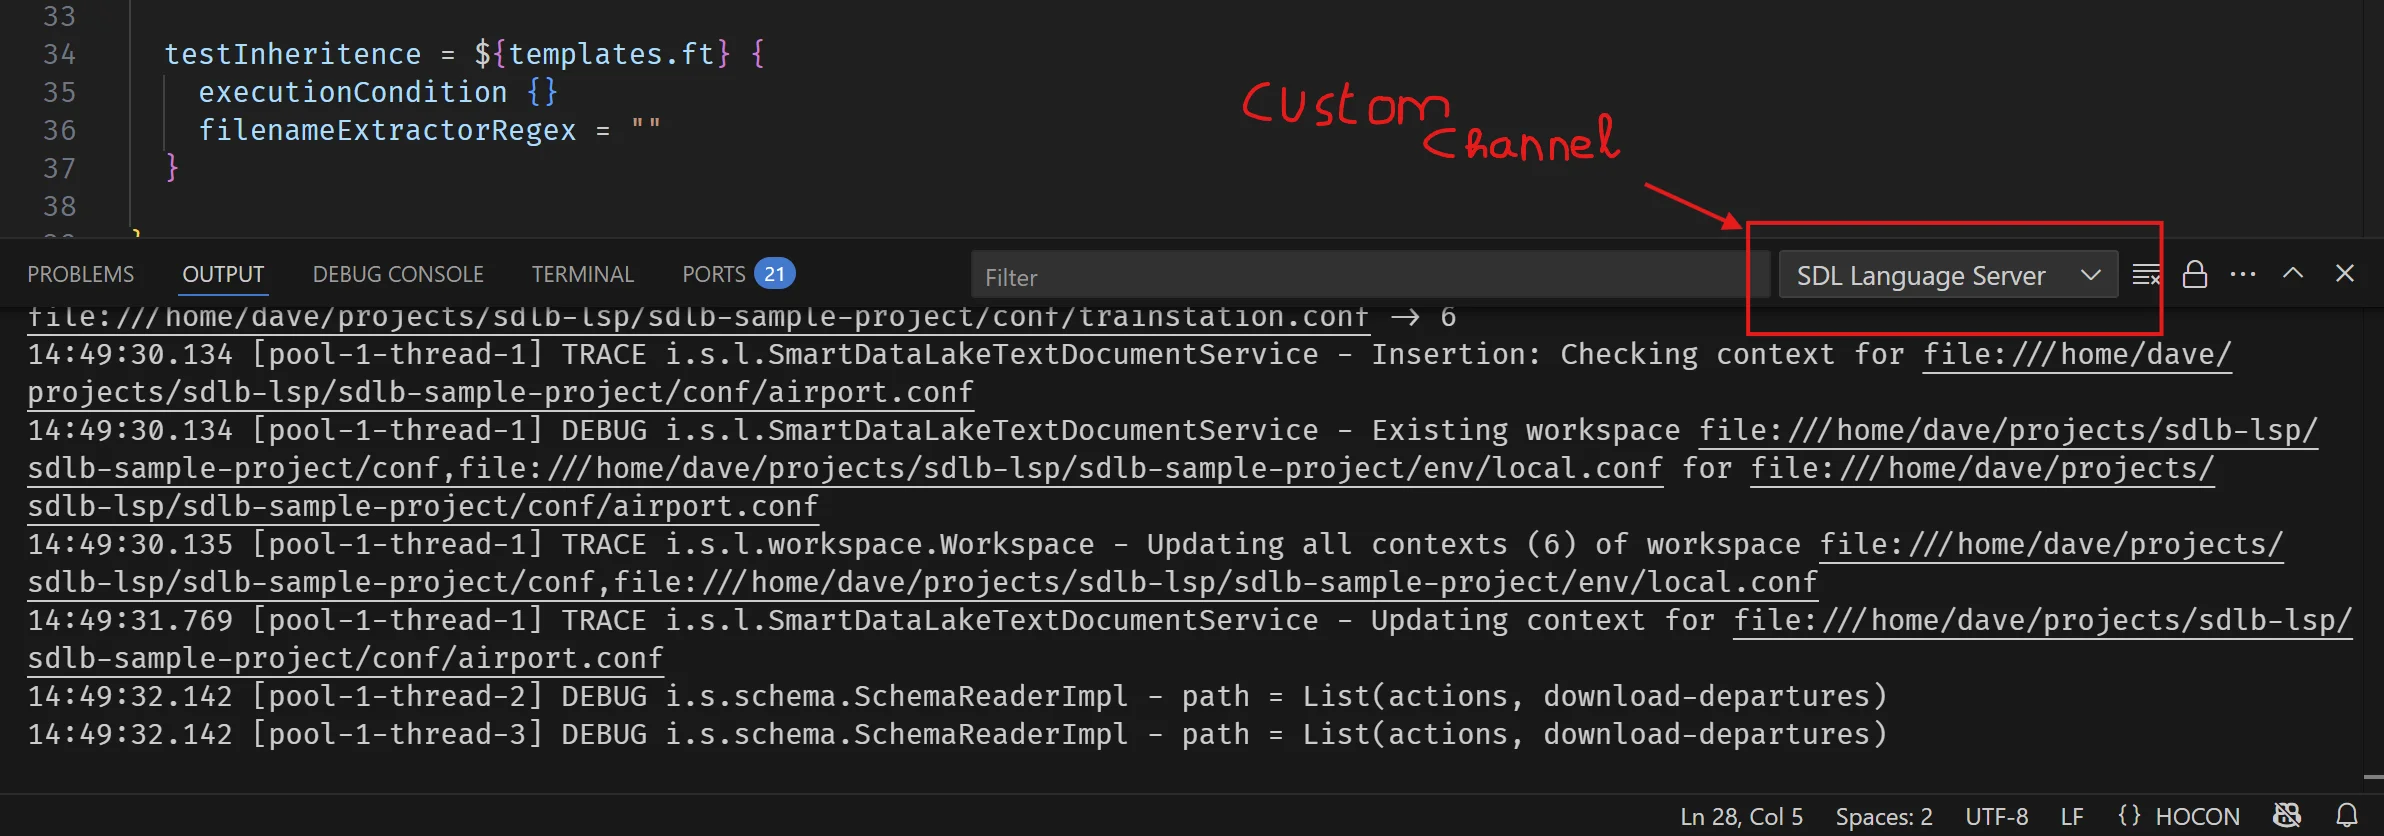
Streaming Logs into VSCode: Smooth logs streaming into VSCode
Getting Started from Scratch
If you want to build a similar extension, here’s how to start from Microsoft’s LSP sample:
# Clone the official VSCode extension samples
git clone https://github.com/microsoft/vscode-extension-samples.git

# Navigate to the LSP sample
cd vscode-extension-samples/lsp-sample

# Install dependencies
npm install

# Compile the TypeScript
npm run compile

# Open in VSCode
code .
This gives you a solid foundation with a working client-server setup that you can customize for your specific needs.
Project Structure and Configuration
Package.json Configuration
The heart of any VSCode extension is its package.json file. Here’s how we configured ours:
{
  "name": "sdlb-lsp",
  "displayName": "SDLB Language Server",
  "description": "VSCode extension for Smart Data Lake Builder with intelligent features",
  "version": "0.0.1",
  "engines": {
    "vscode": "^1.74.0"
  },
  "categories": ["Programming Languages"],
  "activationEvents": ["onLanguage:hocon"],
  "main": "./out/extension.js"
}
Language Definition
One of the key aspects was defining the HOCON language support:
"contributes": {
  "languages": [
    {
      "id": "hocon",
      "aliases": ["HOCON", "SDLB LSP"],
      "extensions": [".conf", ".hocon"],
      "configuration": "./language-configuration.json"
    }
  ],
  "grammars": [
    {
      "language": "hocon",
      "scopeName": "source.hocon",
      "path": "./syntaxes/hocon.tmLanguage.json"
    }
  ]
}
Custom Commands
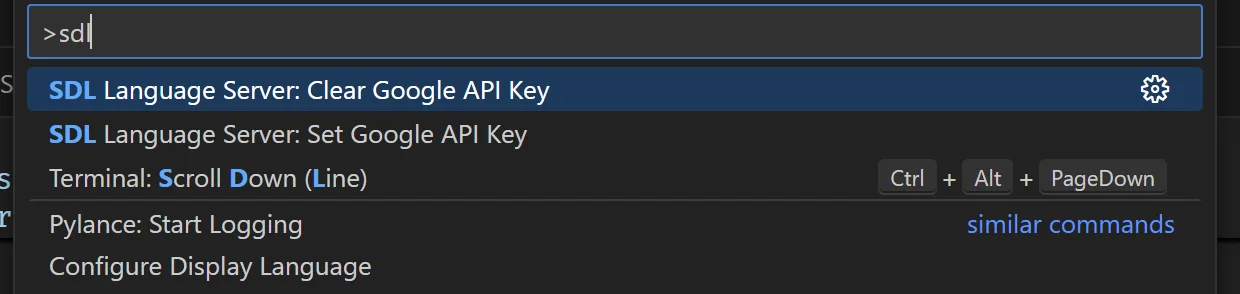
We added several commands to enhance the user experience:
"commands": [
  {
    "command": "sdlLanguageServer.setGoogleApiKey",
    "title": "Set Google API Key",
    "category": "SDL Language Server"
  },
  {
    "command": "sdlLanguageServer.clearGoogleApiKey",
    "title": "Clear Google API Key",
    "category": "SDL Language Server"
  },
  {
    "command": "sdlLanguageServer.disableCopilotForHocon",
    "title": "Disable GitHub Copilot for HOCON files"
  },
  {
    "command": "sdlLanguageServer.enableCopilotForHocon",
    "title": "Enable GitHub Copilot for HOCON files"
  }
]
Core Implementation Details
Extension Activation
The extension activates when a HOCON file is opened, immediately setting up the language client:
export function activate(context: ExtensionContext) {
  extensionContext = context;

  // Create output channel for LSP logs
  lspOutputChannel = window.createOutputChannel('SDL Language Server', 'SDL LSP');

  // Register all commands
  registerCommands(context);

  // Initialize the language client
  initializeLanguageClient(context);
}
Language Client Setup
The core of the extension is the language client that communicates with the Java-based language server:
async function createLanguageClient(context: ExtensionContext): Promise<LanguageClient> {
  const serverOptions = await getServerOptions(context);
  const clientOptions = getClientOptions();

  return new LanguageClient(
    EXTENSION_ID,
    EXTENSION_NAME,
    serverOptions,
    clientOptions
  );
}
Server Configuration
The server options define how to launch the Java language server:
async function getServerOptions(context: ExtensionContext): Promise<ServerOptions> {
  const command = 'java';
  const jarPath = path.join(context.extensionPath, 'server', 'sdl-lsp-1.0-SNAPSHOT-jar-with-dependencies.jar');

  const args = ['-jar', jarPath, '--client vscode'];

  const apiKey = await getStoredApiKey(context);
  const env = { ...process.env };

  if (apiKey) {
    env.GOOGLE_API_KEY = apiKey;
  }

  return { command, args, options: { env } };
}
Secure API Key Management
One of the unique features of this extension is its secure handling of Google API keys for enhanced AI completions:
Storing API Keys Securely
async function storeApiKey(context: ExtensionContext, apiKey: string): Promise<void> {
  await context.secrets.store(GOOGLE_API_KEY_SECRET, apiKey);
}

async function getStoredApiKey(context: ExtensionContext): Promise<string | undefined> {
  return await context.secrets.get(GOOGLE_API_KEY_SECRET);
}
User-Friendly API Key Setup
The extension provides a smooth onboarding experience:
async function promptForApiKey(context: ExtensionContext): Promise<boolean> {
  const apiKey = await window.showInputBox({
    prompt: 'Enter your Google API Key',
    placeHolder: 'AIza...',
    password: true,
    ignoreFocusOut: true,
    validateInput: (value: string) => {
      if (!value || value.trim().length === 0) {
        return 'API Key cannot be empty';
      }
      if (!value.startsWith('AIza')) {
        return 'Google API Keys typically start with "AIza"';
      }
      if (value.length < 35) {
        return 'Google API Keys are typically longer than 35 characters';
      }
      return null;
    }
  });

  if (apiKey) {
    await storeApiKey(context, apiKey.trim());
    return true;
  }

  return false;
}
GitHub Copilot Integration
The extension includes handy commands to control GitHub Copilot for HOCON files:
async function controlCopilotForHocon(enable: boolean): Promise<void> {
  const config = workspace.getConfiguration('github.copilot');
  let currentEnableSettings = config.get('enable') || {};

  return config.update('enable', {
    ...currentEnableSettings,
    [LANGUAGE_ID]: enable,
    [`[${LANGUAGE_ID}]`]: enable
  }, true);
}
Building and Packaging
Development Dependencies
The extension uses several key dependencies:
{
  "dependencies": {
    "vscode-languageclient": "^8.1.0"
  },
  "devDependencies": {
    "@types/vscode": "^1.74.0",
    "@types/node": "16.x",
    "@typescript-eslint/eslint-plugin": "^5.59.1",
    "@typescript-eslint/parser": "^5.59.1",
    "eslint": "^8.39.0",
    "typescript": "^5.0.4"
  }
}
Packaging with VSCE
To package your extension for distribution:
# Install the Visual Studio Code Extension manager
npm install -g vsce

# Package the extension
vsce package

# This creates a .vsix file that can be installed in VSCode
You can then install the packaged extension using:
code --install-extension your-extension-name.vsixKey Learnings and Best Practices
1. Graceful Degradation
The extension works even without an API key, providing basic LSP functionality while offering enhanced features when configured.
2. Secure Secret Management
Always use VSCode’s built-in secret storage for sensitive data like API keys rather than storing them in settings or files.
3. User Experience First
Provide clear prompts, validation, and feedback to users. The API key input includes validation to catch common mistakes.
4. Command Organization
Group related commands under categories to keep the command palette organized.
5. Error Handling
Implement comprehensive error handling and provide meaningful error messages to users.
Future Enhancements
While our current implementation is fully functional, there are several areas where it could be enhanced:
- VS Code Marketplace: Submit the extension for official distribution through the Visual Studio Code Marketplace
- Official template for LSP4IJ in IntelliJ: Create a formal and standard default template published within LSP4IJ.
Conclusion: A Complete LSP Journey
After ten comprehensive articles, we’ve successfully built a complete Language Server Protocol implementation from the ground up. This journey has taken us through every aspect of modern language tooling development, from foundational concepts to production-ready implementations.
What We’ve Accomplished

The Power of LSP
This series demonstrates why the Language Server Protocol has become the standard for language tooling:

Final Thoughts
Building a Language Server Protocol implementation is both challenging and rewarding. It requires understanding not just the technical aspects of parsing and language semantics, but also the human factors that make tools truly useful. By focusing on user experience, performance, and extensibility, we’ve created something that genuinely improves the developer experience for Smart Data Lake Builder users.
The techniques and patterns demonstrated in this series are applicable far beyond HOCON and configuration files. Whether you’re building tooling for a domain-specific language, extending an existing language with new capabilities, or creating entirely new programming languages, the LSP approach provides a proven path to delivering professional-grade developer tools.
Thank you for joining me on this journey through the world of Language Server Protocol development. I hope this series has provided you with both the technical knowledge and the inspiration to build amazing language tooling of your own!
If you found this series valuable, please consider starring the repositories and sharing your own LSP implementations with the community. The future of developer tooling depends on all of us pushing the boundaries of what’s possible.